

Settings under your username
Adjust appearance, language and notifications, and maintain your own profile. You need to be signed in.
Open settings
- Open the navigation menu in the top left if the sidebar is hidden.
- Click your username at the bottom of the sidebar.
- Choose Settings.
| Tab | What you will find |
|---|---|
| System | Appearance, language and browser notifications |
| User | Your profile image and personal contact details |
| Workspace | Profile, defaults and management for the selected workspace |
| Plan & Access Points | Plan and capacity management directly in the tab |
Here, “System” means your app preferences. You do not need internal system administrator permissions. Workspace actions depend on your permissions in that workspace.
Appearance and language
Open System. Under Appearance, choose Light, Dark or System. The third option automatically follows your device appearance.
Under Language, choose Deutsch or English. The interface switches immediately; no separate save action is needed. Appearance changes also apply immediately. These preferences are stored locally for the browser you are using.
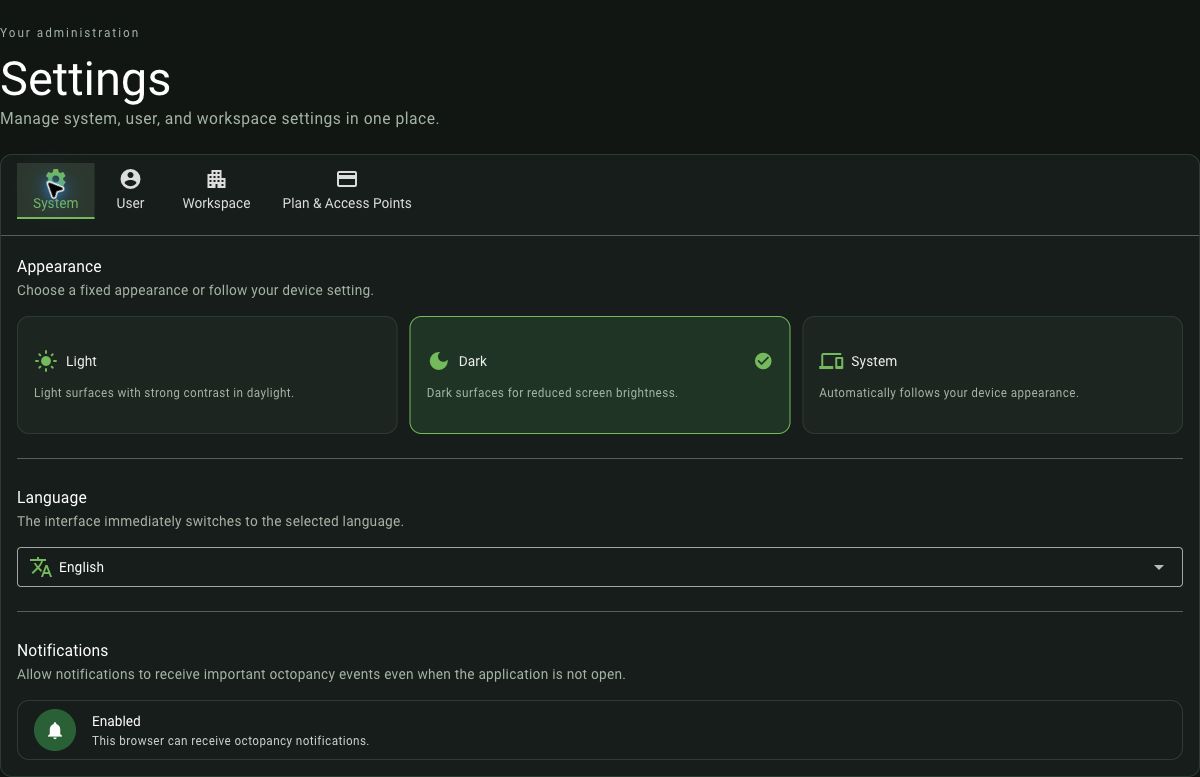
This screenshot shows the status of this browser. Your device may display a different notification status.
Enable notifications
- Open System and find Notifications.
- Check the displayed status.
- If Enable is available, click it and allow notifications in the browser prompt.
- Afterwards, check that the status is Enabled.
Permission applies to the individual browser or device. Simply opening settings does not request permission.
| Status | Next step |
|---|---|
| Not enabled yet | Start setup with Enable. |
| Enabled | This browser can receive notifications. |
| Blocked in browser | Allow notifications again in your browser’s site permissions. |
| Temporarily unavailable | Try registration again later. |
| Not supported | Notifications are unavailable in this browser or app environment. |
To turn notifications off, use your browser’s site permissions. This section currently has no separate off switch or selection of individual notification categories. Enabled confirms setup, not delivery of every message.
Edit personal contact details
- Switch to User.
- Under My contact details, click Edit.
- Enter your first name, last name, phone number and address. Additional address details provides extra address lines and State / region.
- Confirm with Save. Cancel discards the draft.
The dialog closes after a successful save. Check the details in the overview. These details belong to your own octopancy profile; they are neither your workspace’s contact or billing details nor a guest record created under People.
The displayed Sign-in email belongs to your centrally managed sign-in account. You cannot change it in this contact dialog. A password change is not offered here either.
Manage your profile image
- Open User and click your profile image or the avatar showing your initials.
- Choose Choose image and select a JPEG, PNG or WebP file of up to 10 MiB.
- Wait for processing and upload to finish. Upload starts automatically after file selection.
- After a successful upload, select Done and check the image in your profile.
Close is disabled during upload and processing. After an error or timeout, Close becomes available again.
To replace the image, select a new file. To remove it, open Image actions, choose Delete and confirm the prompt. This image belongs to your user account; workspace images are managed separately.
If something goes wrong
- Profile changed in the meantime: Close and reopen the contact dialog before entering your changes again.
- Invalid contact details: Check the displayed field limits and selected country.
- Contact details unavailable: Try again later. Editing is unavailable until the profile data has loaded.
- Image rejected: Check the format and file size. If your session has expired, sign in again.
Workspace and plan
The remaining tabs lead to settings explained in separate guides: